
Now, let's talk about the most common elements for working with text. First, you will learn about the paragraph element <p></p> which is used for displaying text.
<p>I love to teach you HTML!</p>
Sometimes, you may want to emphasize a part of a text. Let's say, the HTML word here. To do that, we can wrap it inside an emphasis element <em></em>
So, here I type the following:
<p> I love to teach you <em>HTML</em>!</p>
Whenever we want to emphasize some content, we can wrap it inside an <em></em> element.
Here is how it looks on VS Code:
<!DOCTYPE html>
<html lang="en">
    <head>
        <meta charset="UTF-8" />
        <meta http-equiv="X-UA-Compatible" content="IE-edge" />
        <meta name="viewport" content="width=device-width, initial-scale=1.0" />
        <meta name="keywords" content="HTML, CSS" />
        <meta name="description" content="This is a simple HTML and CSS project" />
        <title>Document</title>
    </head>
    <body>
        <p>I love to teach you <em>HTML</em>!</p>
    </body>
</html>

Now, let's save the changes.
This is what we get:
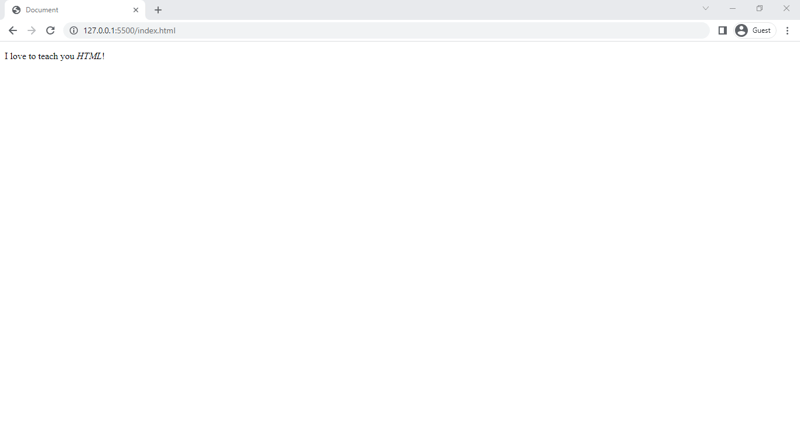 The paragraph displayed on the browser with HTML emphasized
By default, browsers display emphasized content in italic. But, don't assume that when you want to display content in italic, you should use the <em></em> element. Because, the purpose of the <em></em> element is to emphasize content in our HTML document. This helps search engines extract important content in our documents.
Anything to do with styling should be done in CSS.
For example, here we can change the default style of emphasized elements and remove the italic. Let me show you how it works.
So, in the head section, we add the styled element like this:
<!DOCTYPE html>
<html lang="en">
    <head>
        <meta charset="UTF-8" />
        <meta http-equiv="X-UA-Compatible" content="IE-edge" />
        <meta name="viewport" content="width=device-width, initial-scale=1.0" />
        <meta name="keywords" content="HTML, CSS" />
        <meta name="description" content="This is a simple HTML and CSS project" />
        <style>

        </style>
        <title>Document</title>
    </head>
    <body>
        <p>I love to teach you <em>HTML</em>!</p>
    </body>
</html>

Here, we define a rule for emphasized content:
<!DOCTYPE html>
<html lang="en">
    <head>
        <meta charset="UTF-8" />
        <meta http-equiv="X-UA-Compatible" content="IE-edge" />
        <meta name="viewport" content="width=device-width, initial-scale=1.0" />
        <meta name="keywords" content="HTML, CSS" />
        <meta name="description" content="This is a simple HTML and CSS project" />
        <style>
            em {

            }
        </style>
        <title>Document</title>
    </head>
    <body>
        <p>I love to teach you <em>HTML</em>!</p>
    </body>
</html>

We can set the color to red.
<!DOCTYPE html>
<html lang="en">
    <head>
        <meta charset="UTF-8" />
        <meta http-equiv="X-UA-Compatible" content="IE-edge" />
        <meta name="viewport" content="width=device-width, initial-scale=1.0" />
        <meta name="keywords" content="HTML, CSS" />
        <meta name="description" content="This is a simple HTML and CSS project" />
        <style>
            em{
                color: red;
            }
        </style>
        <title>Document</title>
    </head>
    <body>
        <p>I love to teach you <em>HTML</em>!</p>
    </body>
</html>

And font-style to normal.
<!DOCTYPE html>
<html lang="en">
    <head>
        <meta charset="UTF-8" />
        <meta http-equiv="X-UA-Compatible" content="IE-edge" />
        <meta name="viewport" content="width=device-width, initial-scale=1.0" />
        <meta name="keywords" content="HTML, CSS" />
        <meta name="description" content="This is a simple HTML and CSS project" />
        <style>
            em {
                color: red;
                font-style: normal;
            }
        </style>
        <title>Document</title>
    </head>
    <body>
        <p>I love to teach you <em>HTML</em>!</p>
    </body>
</html>

Now, don't worry about memorizing any of these CSS properties. We are going to go over them multiple times throughout the remainder of this tutorial.
But let's see what happens now that we apply these styles.

So, our emphasized content is displayed in red, and it is no longer italic.
For the full free Handbook: HTML and CSS handbook for Beginners
Now, in the past, we had an element called <i></i> which is short for italic.
<!DOCTYPE html>
<html lang="en">
    <head>
        <meta charset="UTF-8" />
        <meta http-equiv="X-UA-Compatible" content="IE-edge" />
        <meta name="viewport" content="width=device-width, initial-scale=1.0" />
        <meta name="keywords" content="HTML, CSS" />
        <meta name="description" content="This is a simple HTML and CSS project" />
        <style>
            em {
                color: red;
                font-style: normal;
            }
        </style>
        <title>Document</title>
    </head>
    <body>
        <p>I love to teach you <i>HTML</i>!</p>
    </body>
</html>

If we use this element, we get the same result as before. Our content is displayed in italics. But, this element is considered deprecated, because HTML is not meant for styling. It should only be used for structuring content.
So, don't use the <i></i> element to display content as italic.
Now, we have a similar element in HTML called <strong></strong> The strong element represents strong importance, seriousness, or urgency for its contents. Conceptually, it is similar to the emphasis element, so where you should use it really depends on your context.
Let's save the changes and see what we get.

So, by default, strong elements are displayed as bold. But, once again, we can always change the styling.
Now, in the past we had another element called <b></b> which is short for bold. So, whenever we wanted to make something bold, we used this element.
<!DOCTYPE html>
<html lang="en">
    <head>
        <meta charset="UTF-8" />
        <meta http-equiv="X-UA-Compatible" content="IE-edge" />
        <meta name="viewport" content="width=device-width, initial-scale=1.0" />
        <meta name="keywords" content="HTML, CSS" />
        <meta name="description" content="This is a simple HTML and CSS project" />
        <style>
            em {
                color: red;
                font-style: normal;
            }
        </style>
        <title>Document</title>
    </head>
    <body>
        <p>I love to teach you <b>HTML</b>!</p>
    </body>
</html>

But, once again, this element is considered deprecated because styling should be done in CSS and not in HTML. So, don't use <b></b> or <i></i> elements.
Now, this is all about the text.
Happy Coding!


