HTML, CSS and JavaScript can help you create stylish and dynamic web elements. One of those kind of element is an Accordion Menu.
In this tutorial, we will build a simple Accordion Menu.
What is an Accordion?
In UI design, an accordion is a vertically stacked list of information. For each list, there is a labelled header pointing to a corresponding content. The content is hidden by default. Clicking on a particular label will expand its content.
One very common use case for accordions to hold a list of frequently asked questions. Clicking on any question will toggle a corresponding answer.
You can get the code for this project from Codepen
How to build an accordion using HTML, CSS and JS
We begin by defining the markup. If you are using an IDE like VSCode and you do have emmet installed, create a new index.html file and type ! followed by enter. This should create a HTML boilerplate code for your project.
Alternatively, you can copy the following code into your index.html
<!DOCTYPE html>
<html lang="en">
<head>
  <meta charset="UTF-8">
  <meta name="viewport" content="width=device-width, initial-scale=1.0">
  <meta http-equiv="X-UA-Compatible" content="ie=edge">
  <title>Document</title>
  <link rel="stylesheet" href="styles.css">
</head>
<body>

  <script src="app.js" type="text/javascript"></script>
</body>
</html>
The folder structure is simple. We will create a folder called accordion. Inside the folder we will create three files: index.html, styles.css and app.js. We will also link all files into our HTML marjup as observed above.
HTML Markup For the Accordion
The HTML for the accordion is also going to be quite simple.
<body>


  <div class="accordion-body">
  <div class="accordion">
    <h1>Frequently Asked Questions</h1>
    <hr>
    <div class="container">
      <div class="label">What is HTML</div>
      <div class="content">Hypertext Markup Language (HTML) is a computer language that makes up most web pages and online applications. A hypertext is a text that is used to reference other pieces of text, while a markup language is a series of markings that tells web servers the style and structure of a document. HTML is very simple to learn and use.</div>
    </div>
    <hr>
    <div class="container">
      <div class="label">What is CSS?</div>
      <div class="content">CSS stands for Cascading Style Sheets. It is the language for describing the presentation of Web pages, including colours, layout, and fonts, thus making our web pages presentable to the users. CSS is designed to make style sheets for the web. It is independent of HTML and can be used with any XML-based markup language. CSS is popularly called the design language of the web.
</div>
    </div>
    <hr>
    <div class="container">
      <div class="label">What is JavaScript?</div>
      <div class="content">JavaScript is a scripting or programming language that allows you to implement complex features on web pages — every time a web page does more than just sit there and display static information for you to look at — displaying timely content updates, interactive maps, animated 2D/3D graphics, scrolling video jukeboxes, etc. — you can bet that JavaScript is probably involved. It is the third of the web trio.</div>
    </div>
    <hr>
    <div class="container">
      <div class="label">What is React?</div>
      <div class="content">React is a JavaScript library created for building fast and interactive user interfaces for web and mobile applications. It is an open-source, component-based, front-end library responsible only for the application’s view layer. In Model View Controller (MVC) architecture, the view layer is responsible for how the app looks and feels. React was created by Jordan Walke, a software engineer at Facebook. </div>
    </div>
    <hr>
    <div class="container">
      <div class="label">What is PHP?</div>
      <div class="content">PHP is a server-side and general-purpose scripting language that is especially suited for web development. PHP originally stood for Personal Home Page. However, now, it stands for Hypertext Preprocessor. It’s a recursive acronym because the first word itself is also an acronym.</div>
    </div>
    <hr>
    <div class="container">
      <div class="label">What is Node JS?</div>
      <div class="content">Node.js is an open-source, cross-platform, back-end JavaScript runtime environment that runs on the V8 engine and executes JavaScript code outside a web browser. Node.js lets developers use JavaScript to write command line tools and for server-side scripting—running scripts server-side to produce dynamic web page content before the page is sent to the user's web browser. Consequently, Node.js represents a "JavaScript everywhere" paradigm</div>
    </div>
    <hr>
  </div>
  </div>

  <script src="index.js" type="text/javascript"></script>
</body>
At this point, our page will look all bare.

Styling Up the Accordion using CSS
The accordion has to look good of course. Time to bring some CSS into play.
@import url('https://fonts.googleapis.com/css2?family=Rubik:wght@300&display=swap');

/* Sets the background color of the body to blue. Sets font to Rubik */

body {
  background-color: #0A2344;
  font-family: 'rubik', sans-serif;
}

/* Aligns the heading text to the center. */

h1 {
  text-align: center;
}

/* Sets the width for the accordion. Sets the margin to 90px on the top and bottom and auto to the left and right */

.accordion {
  width: 800px;
  margin: 90px auto;
  color: black;
  background-color: white;
  padding: 45px 45px;
}
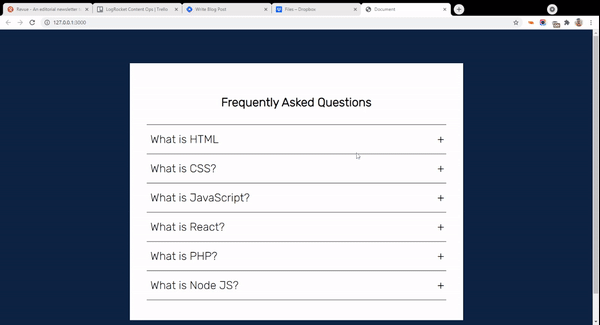
With all of these styled applied, here is how our accordion will look like

Now we need to start doing some work on the inside. First, we position each of the containers (holding both the label and content) to relative. That means we can now position it's children relative to the parent.
.accordion .container {
  position: relative;
  margin: 10px 10px;
}

/* Position the labels relative to the .container. Add padding to the top and bottom and increase font size. Also make it's cursor a pointer */

.accordion .label {
  position: relative;
  padding: 10px 0;
  font-size: 30px;
  color: black;
  cursor: pointer;
}
Notice the difference now

The next action will be to append a little '+' sign at the end of each list. We will achieve this using the ::before selector. The ::before and ::after selector is used to place content before of after a specified element.
Here, we are inserting '+' before the label. However, we will use the offset properties 'top' and right to place it at the far right corner.
/* Position the plus sign 5px from the right. Center it using the transform property. */\

.accordion .label::before {
  content: '+';
  color: black;
  position: absolute;
  top: 50%;
  right: -5px;
  font-size: 30px;
  transform: translateY(-50%);
}

/* Hide the content (height: 0), decrease font size, justify text and add transition */

.accordion .content {
  position: relative;
  background: white;
  height: 0;
  font-size: 20px;
  text-align: justify;
  width: 780px;
  overflow: hidden;
  transition: 0.5s;
}

/* Add a horizontal line between the contents */

.accordion hr {
  width: 100;
  margin-left: 0;
  border: 1px solid grey;
}
Now our app will look far far better than it previously did

Bringing In JavaScript
At this point, our accordion is pretty much static. To make it display the content when clicked, we will need to bring in some JavaScript.
Navigate to your app.js file and type in the following
const accordion = document.getElementsByClassName('container');

for (i=0; i<accordion.length; i++) {
  accordion[i].addEventListener('click', function () {
    this.classList.toggle('active')
  })
}
This script will access all of our lists by classname of 'container'.
Then we will loop through the list. For each container, we simply want to add an event listener to it. When it gets clicked, we want to toggle the class "active" on that element.
Now we are going to test this effect. Click the first container with the label What is HTML, open your DevTool (F12 For Chrome on Windows) and inspect it inside of the elements tab.
You should find the active class registered on it

Clicking on the element again will remove the active class from it.
Completing the App
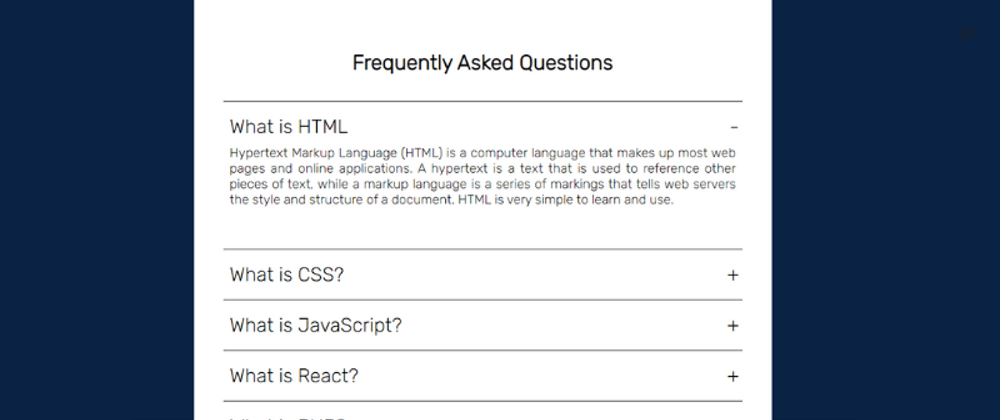
There is one last thing we need to do. We need to create an active class within an stylesheet. We will define how we want our accordion to look once JavaScript toggles the class on a container.
/* Unhides the content part when active. Sets the height */

.accordion .container.active .content {
  height: 150px;
}

/* Changes from plus sign to negative sign once active */

.accordion .container.active .label::before {
  content: '-';
  font-size: 30px;
}
This is our app in the end.
Wrapping Up
Thanks for following along. I hope you learnt something useful from this tutorial.
If you are interested in content like this, I make them daily on my blog.
Have a great week.
P/S: If you are learning JavaScript, I created an eBook which teaches 50 topics in JavaScript with hand-drawn digital notes. Check it out here.


