
Hello Coders,
This article presents a simple Flask starter coded on top StarAdmin Dashboard (Free Version) crafted by BootstrapDash.
The app codebase, kept as simple as possible, is provided with a basic set of features like authentication, pre-configured for SQLite/PostgreSQL, Flask-SqlAlchemy ORM, and basic deployment tuning for Docker and Heroku.
TL;DR; - The Links for
Usain Boldalike devs
- Flask StarAdmin - LIVE Demo
- Flask StarAdmin - source code, MIT License
- Flask StarAdmin - product page, hosted by AppSeed
- Flask StarAdmin PRO - Premium version

What is Flask
Flask is a lightweight WSGI web application framework. It is designed to make getting started quick and easy, with the ability to scale up to complex applications. Classified as a microframework, Flask is written in Python and it does not require particular tools or libraries. It has no database abstraction layer, form validation, or any other components where pre-existing third-party libraries provide common functions.
Flask Links
- Flask - the official website
- Flask Documentation
Environment
To use the stater, Python3 should be installed properly in the workstation. If you are not sure about that, please open a terminal and type python --version. The full-list with dependencies and tools required to build the app:
- Python3 - the programming language used to code the app
- GIT - used to clone the source code from the Github repository
- Basic development tools (g++ compiler, python development libraries ..etc) used by Python to compile the app dependencies in your environment.
Check Python version (using the terminal)
$ # Check Python version
$ python --version
Python 3.7.2 # <--- All good
Check GIT command tool (using the terminal)
$ # Check git
$ git --version
$ git version 2.10.1.windows.1 # <--- All good
For more information on how to set up your environment please access the resources listed below. In case I've missed something, feel free to contact me on Discord.
- How to set up Python
- Setup CentOS for development
- Setup Ubuntu for development
- Setup Windows for development
Build the app
To built and start the app locally, follow the steps:
Get dashboard source code
- Download the ZIP from Github Repository
- Use GIT tool in the terminal to clone the source code
Follow the build instructions, listed in the README file
$ # Get the code via GIT command tool
$ git clone https://github.com/app-generator/flask-dashboard-staradmin.git
$ cd flask-dashboard-staradmin
$
$ # Create and activate a Virtualenv (Unix based systems)
$ virtualenv env
$ source env/bin/activate
$
$ # Create and activate a Virtualenv (Windows based systems)
$ # virtualenv env
$ # .\env\Scripts\activate
$
$ # Install requirements
$ pip3 install -r requirements.txt
$
$ # Set the FLASK_APP environment variable
$ (Unix/Mac) export FLASK_APP=run.py
$ (Windows) set FLASK_APP=run.py
$ (Powershell) $env:FLASK_APP = ".\run.py"
$
$ # Set up the DEBUG environment
$ # (Unix/Mac) export FLASK_ENV=development
$ # (Windows) set FLASK_ENV=development
$ # (Powershell) $env:FLASK_ENV = "development"
$
$ # Run the application
$ # --host=0.0.0.0 - expose the app on all network interfaces (default 127.0.0.1)
$ # --port=5000    - specify the app port (default 5000)
$ flask run --host=0.0.0.0 --port=5000
$
$ # Access the app in the browser: http://127.0.0.1:5000/
At this point, we can visit the app in the browser http://127.0.0.1:5000/.
By default, the app will redirect guest users to the login page. To access the private pages:
- Create a new user using the registration page
- Authenticate using the login page
The bootstrap flow
-
run.pyloads the.envfile - Initialize the app using the specified profile: Debug or Production
- If env.DEBUG is set to True the SQLite storage is used
- If env.DEBUG is set to False the specified DB driver is used (MySql, PostgreSQL)
- Call the app factory method
create_appdefined in app/init.py - Redirect the guest users to Login page
- Unlock the pages served by home blueprint for authenticated users
.env(saved in the root of the project)
# File: `.env`

DEBUG=True              # Enable/Disable the development environment

SECRET_KEY=S3cr3t_Key   # The Key used by Flask to encrypt session information

# Database production settings (If DEBUG=False)

DB_ENGINE=postgresql    # DBMS
DB_NAME=appseed-flask   # Database Name
DB_HOST=localhost       # Database Host
DB_PORT=5432            # Database Port
DB_USERNAME=appseed     # DB Username
DB_PASS=pass            # DB Password
run.py(simplified version)
# File: run.py

DEBUG = config('DEBUG', default=True)

# Create the WSGI app, using the app factory pattern
app = create_app( app_config )

# Migrate automatically the app using Flask Migrate library
Migrate(app, db)
app/__init__.py(simplified version)
# File: app/__init__.py

db            = SQLAlchemy()        # Invoke SQLAlchemy
login_manager = LoginManager()      # Invoke Login Manager

def register_extensions(app):
    db.init_app(app)                # Inject SQLAlchemy magic
    login_manager.init_app(app)     # Add Login Manager to the app

# Register app blueprints: `base`, `home`
def register_blueprints(app):
    for module_name in ('base', 'home'):
        module = import_module('app.{}.routes'.format(module_name))
        app.register_blueprint(module.blueprint)

# Create the tables (automaticaly)
def configure_database(app):

    @app.before_first_request
    def initialize_database():
        db.create_all()

# Create the WSGI app using the factory pattern
def create_app(config):
    app = Flask(__name__, static_folder='base/static')
    app.config.from_object(config)
    register_extensions(app)
    register_blueprints(app)
    configure_database(app)
    return app
The app/__init__.py constructs the app by putting together a short-list of things:
- Invoke SQLAlchemy
- Invoke and inject the
Login Managerinto the app - Load the configuration from
config.pyfile - Register the app blueprints
- Check if the database tables are created
- return the WSGI app
App Codebase
The starter defines two blueprints:
- Base blueprint - handles the authentication (routes and forms) and assets management
- Home blueprint - serve HTML pages for authenticated users
App / Base Blueprint structure
< PROJECT ROOT >
   |
   |-- app/
   |    |-- home/                                # Home Blueprint - serve app pages (private area)
   |    |-- base/                                # Base Blueprint - handles the authentication
   |         |-- static/
   |         |    |-- <css, JS, images>          # CSS files, Javascripts files
   |         |
   |         |-- templates/                      # Templates used to render pages
   |              |
   |              |-- includes/                  #
   |              |    |-- navigation.html       # Top menu component
   |              |    |-- sidebar.html          # Sidebar component
   |              |    |-- footer.html           # App Footer
   |              |    |-- scripts.html          # Scripts common to all pages
   |              |
   |              |-- layouts/                   # Master pages
   |              |    |-- base-fullscreen.html  # Used by Authentication pages
   |              |    |-- base.html             # Used by common pages
   |              |
   |              |-- accounts/                  # Authentication pages
   |                   |-- login.html            # Login page
   |                   |-- register.html         # Registration page
   |
   |-- requirements.txt                          # Development modules - SQLite storage
   |-- requirements-mysql.txt                    # Production modules  - Mysql DMBS
   |-- requirements-pqsql.txt                    # Production modules  - PostgreSql DMBS
   |
   |-- .env                                      # Inject Configuration via Environment
   |-- config.py                                 # Set up the app
   |-- run.py                                    # Start the app - WSGI gateway
   |
   |-- ************************************************************************
App / Home Blueprint structure
< PROJECT ROOT >
   |
   |-- app/
   |    |-- base/                     # Base Blueprint - handles the authentication
   |    |-- home/                     # Home Blueprint - serve app pages (private area)
   |         |
   |         |-- templates/           # UI Kit Pages
   |              |
   |              |-- index.html      # Default page
   |              |-- page-404.html   # Error 404 - mandatory page
   |              |-- page-500.html   # Error 500 - mandatory page
   |              |-- page-403.html   # Error 403 - mandatory page
   |              |-- *.html          # All other HTML pages
   |
   |-- requirements.txt               # Development modules - SQLite storage
   |-- requirements-mysql.txt         # Production modules  - Mysql DMBS
   |-- requirements-pqsql.txt         # Production modules  - PostgreSql DMBS
   |
   |-- .env                           # Inject Configuration via Environment
   |-- config.py                      # Set up the app
   |-- run.py                         # Start the app - WSGI gateway
   |
   |-- ************************************************************************
What is Heroku
Heroku's a fully-managed platform that helps developers to deploy apps with ease.
Heroku is a cloud-based, fully-managed platform as a service (Paas) for building, running, and managing apps.
A short-list with features:
- Runtime - Heroku empowers developers to deliver products using a CLI, called Heroku Toolbelt
- PostgreSQL DBMS - a powerful database already configured to be production-ready
- Automatic scaling - Heroku scales in an instant, both vertically and horizontally.
- Github integration - trigger production builds directly from Github commits
Heroku Links
- Heroku - the official website
- Heroku Documentation
Deploy the project
As mentioned, the project comes pre-configured for Heroku. The relevant files are listed below:
- runtime.txt - specify the Python version used by Heroku during the build and deploy
- Procfile - configuration file that informs Heroku where to look for the WSGI app interface
- requirements.txt - must contain the
gunicornmodule
Gunicorn module
Gunicorn Green Unicorn is a Python WSGI HTTP Server for UNIX. It’s a pre-fork worker model ported from Ruby’s Unicorn project. The Gunicorn server is broadly compatible with various web frameworks, simply implemented, light on server resources, and fairly speedy.
For basic usage please access the PyPi page or the official docs.
File - runtime.txt
To build the deploy any python-based app, Heroku uses a default Python version python-3.6.10 or the one specified in the runtime.txt file. Supported environment, as per Heroku official documentation - Specifying a Python version:
- python-3.8.3
- python-3.7.7
- python-3.6.10 <-- The Default Version
- python-2.7.18
Procfile
Heroku apps include a Procfile that specifies the commands that are executed by the app on startup. As specified in the official docs, the Procfile is always a simple text file that is named Procfile without a file extension.
web: gunicorn run:app --log-file=-
For our sample, gunicorn is called with run:app argument.
Deployment steps
- Create a FREE account on Heroku platform
- Install the Heroku CLI that match your OS: Mac, Unix or Windows
- Open a terminal window and authenticate via
heroku logincommand - Clone the sources and push the project for LIVE deployment
The full command list, executed on our sample project.
$ # Clone the source code:
$ git clone https://github.com/app-generator/flask-dashboard-staradmin.git
$ cd flask-dashboard-staradmin
$
$ # Check Heroku CLI is installed
$ heroku -v
heroku/7.25.0 win32-x64 node-v12.13.0 # <-- All good
$
$ # Check Heroku CLI is installed
$ heroku login
$ # this command will open a browser window - click the login button (in browser)
$
$ # Create the Heroku project
$ heroku create
$
$ # Trigger the LIVE deploy
$ git push heroku master
$
$ # Open the LIVE app in browser
$ heroku open
At this point, you should be able to visit the app in the browser.
Flask StarAdmin Screens
Charts Screen

UI tables

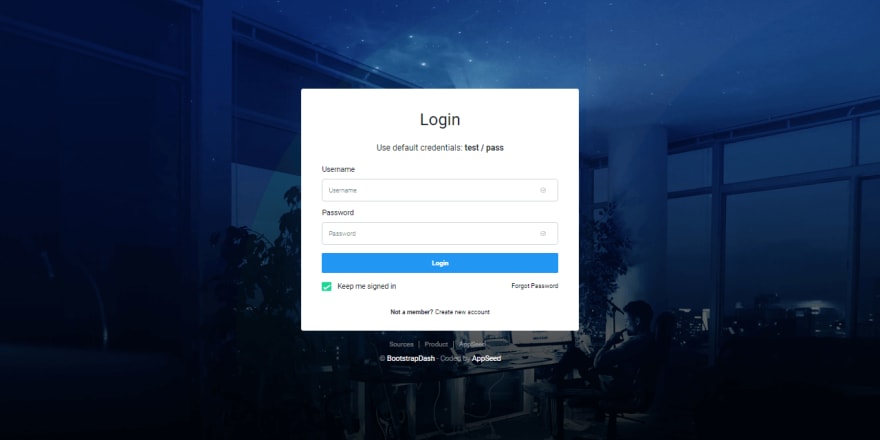
Login Page
Links & Resources
- Flask StarAdmin - LIVE Demo
- Flask StarAdmin - source code
- Flask StarAdmin - product page, hosted by AppSeed
- Codebase documentation - Flask Dashboard Boilerplate
- Flask Admin Dashboards - index provided by AppSeed
A super thank you! if you reach this point. Let me know your thoughts in the comments or via Discord


